We are going to do a demo of long-to-validate blocks on Signet on Wednesday. Here are instructions on how you can join.
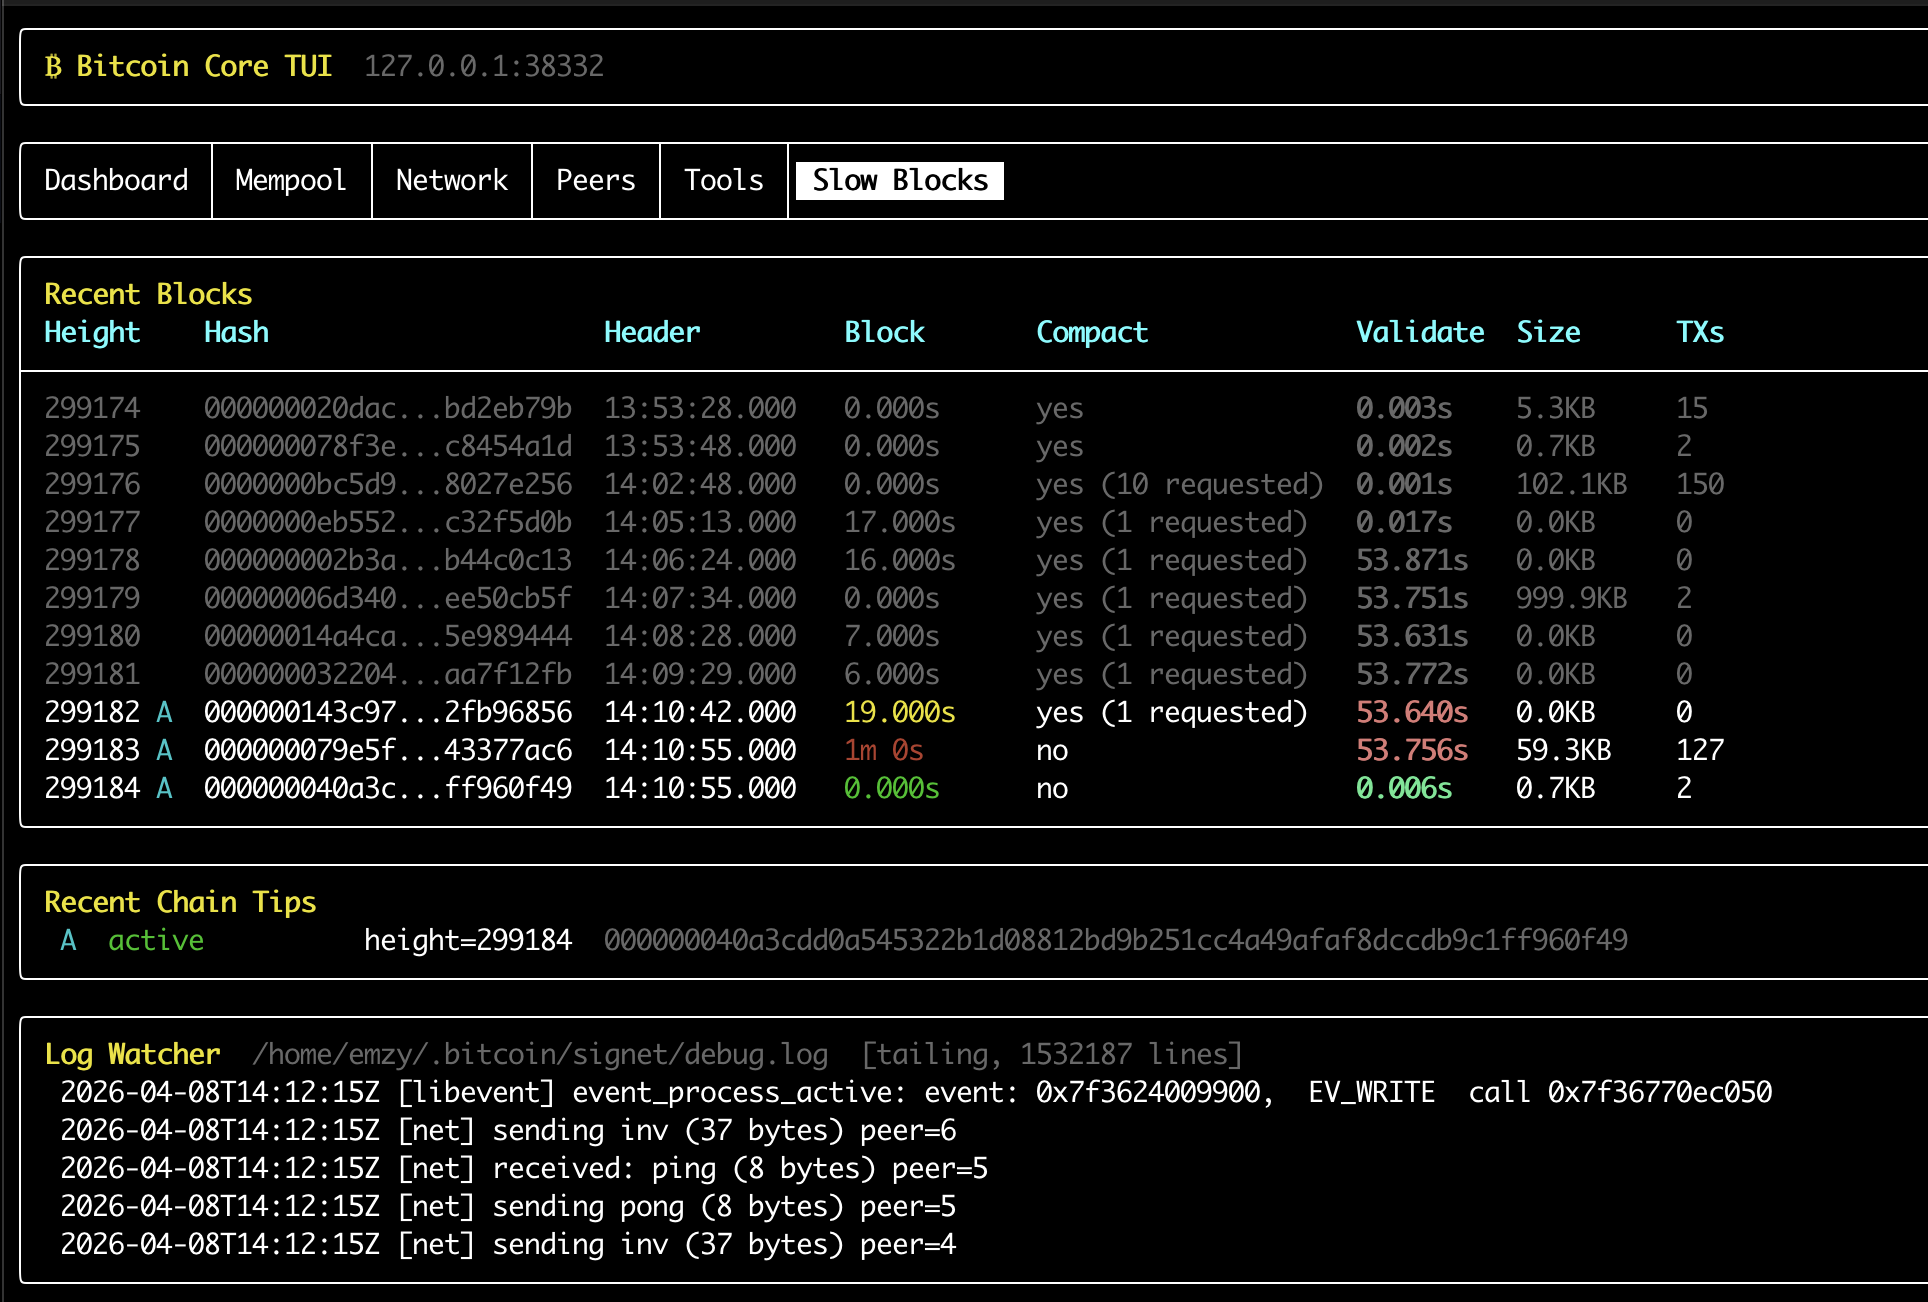
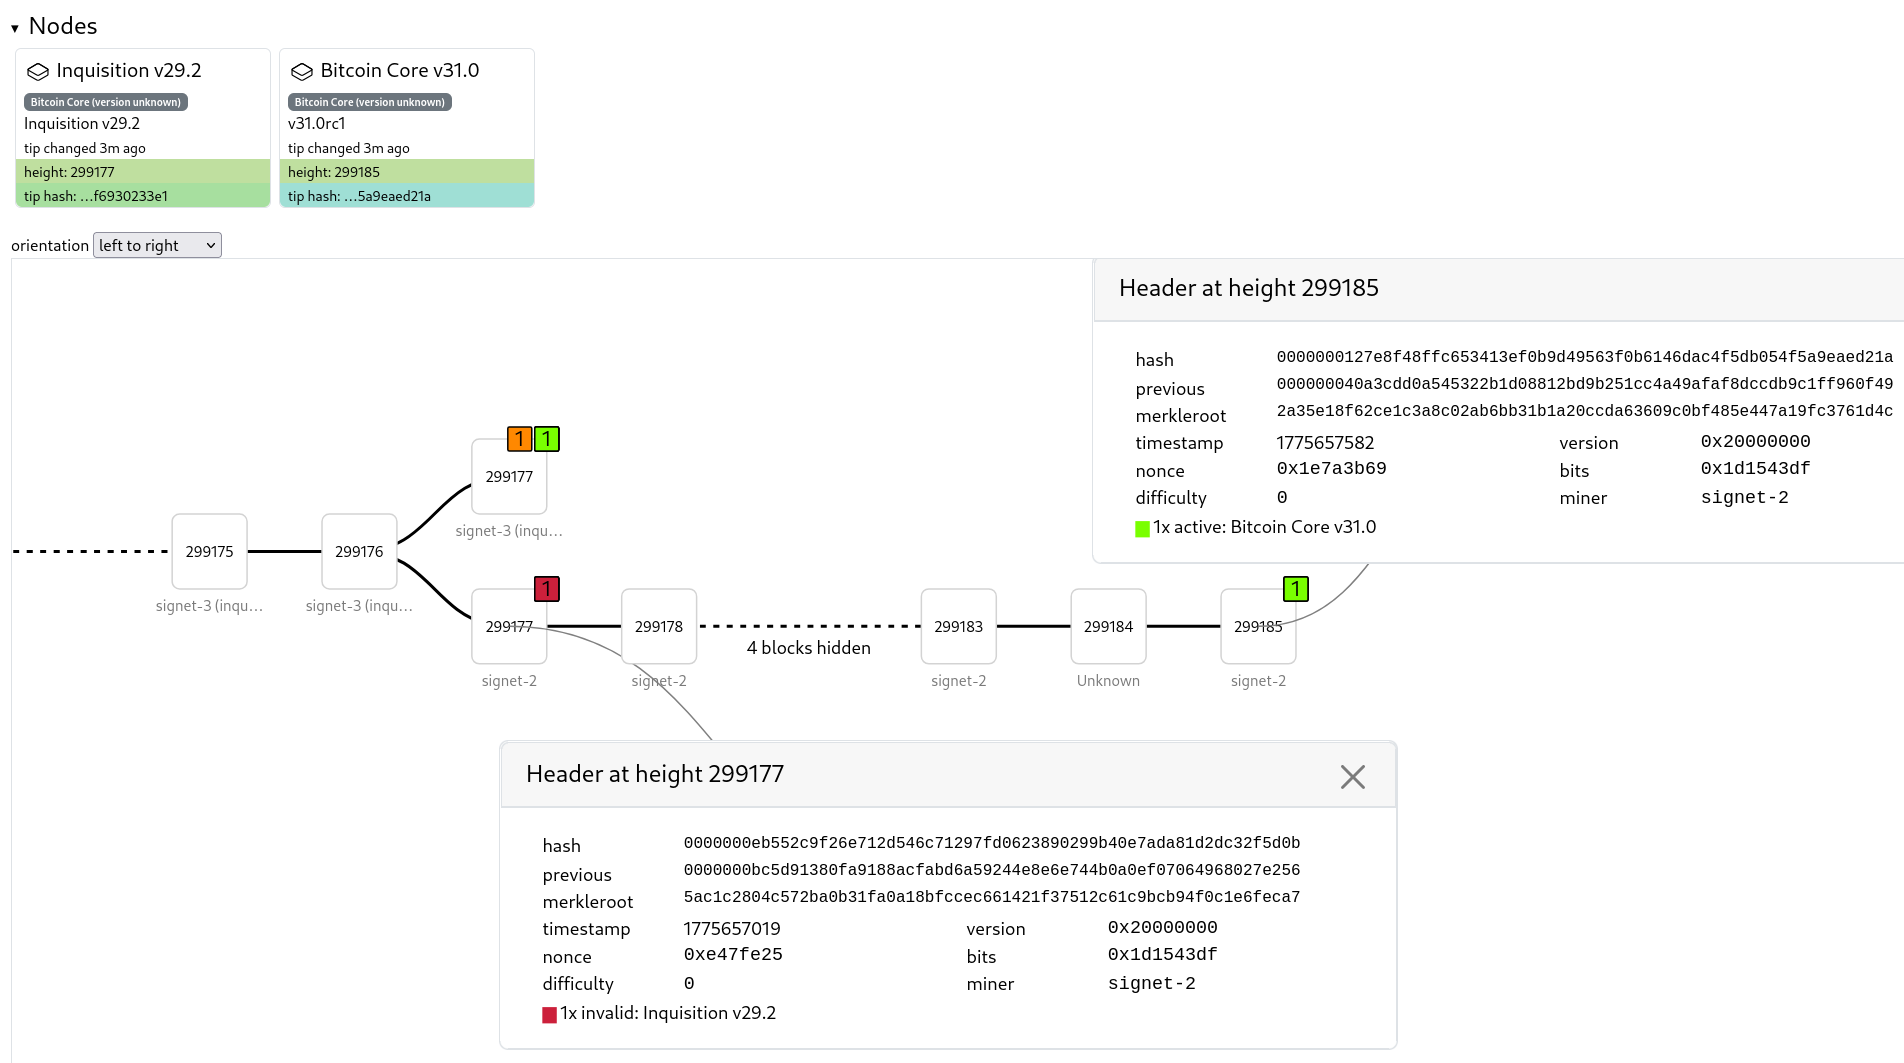
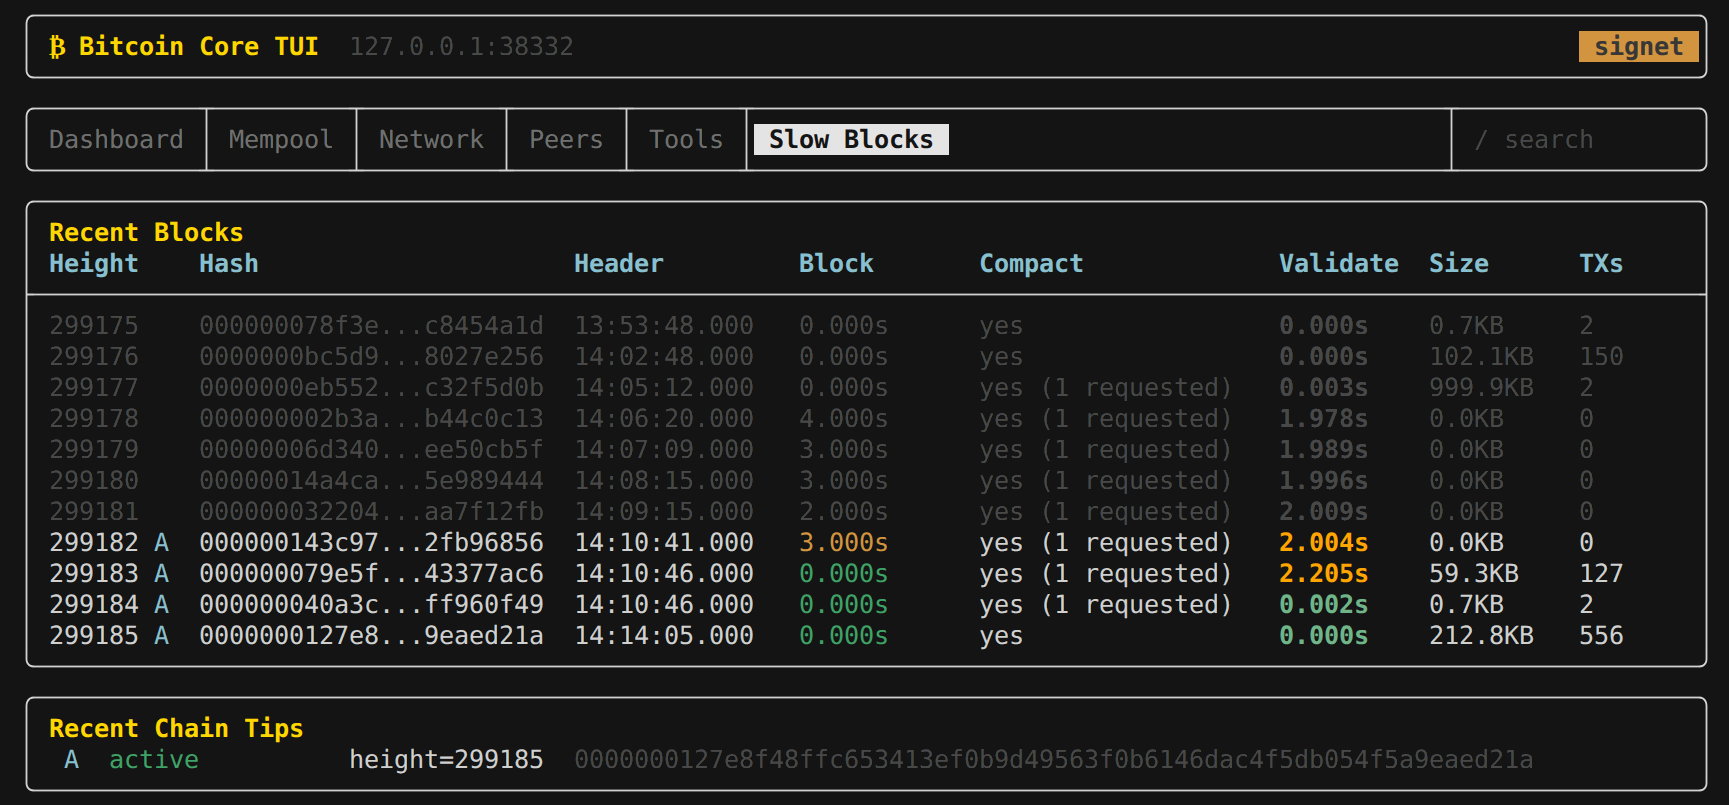
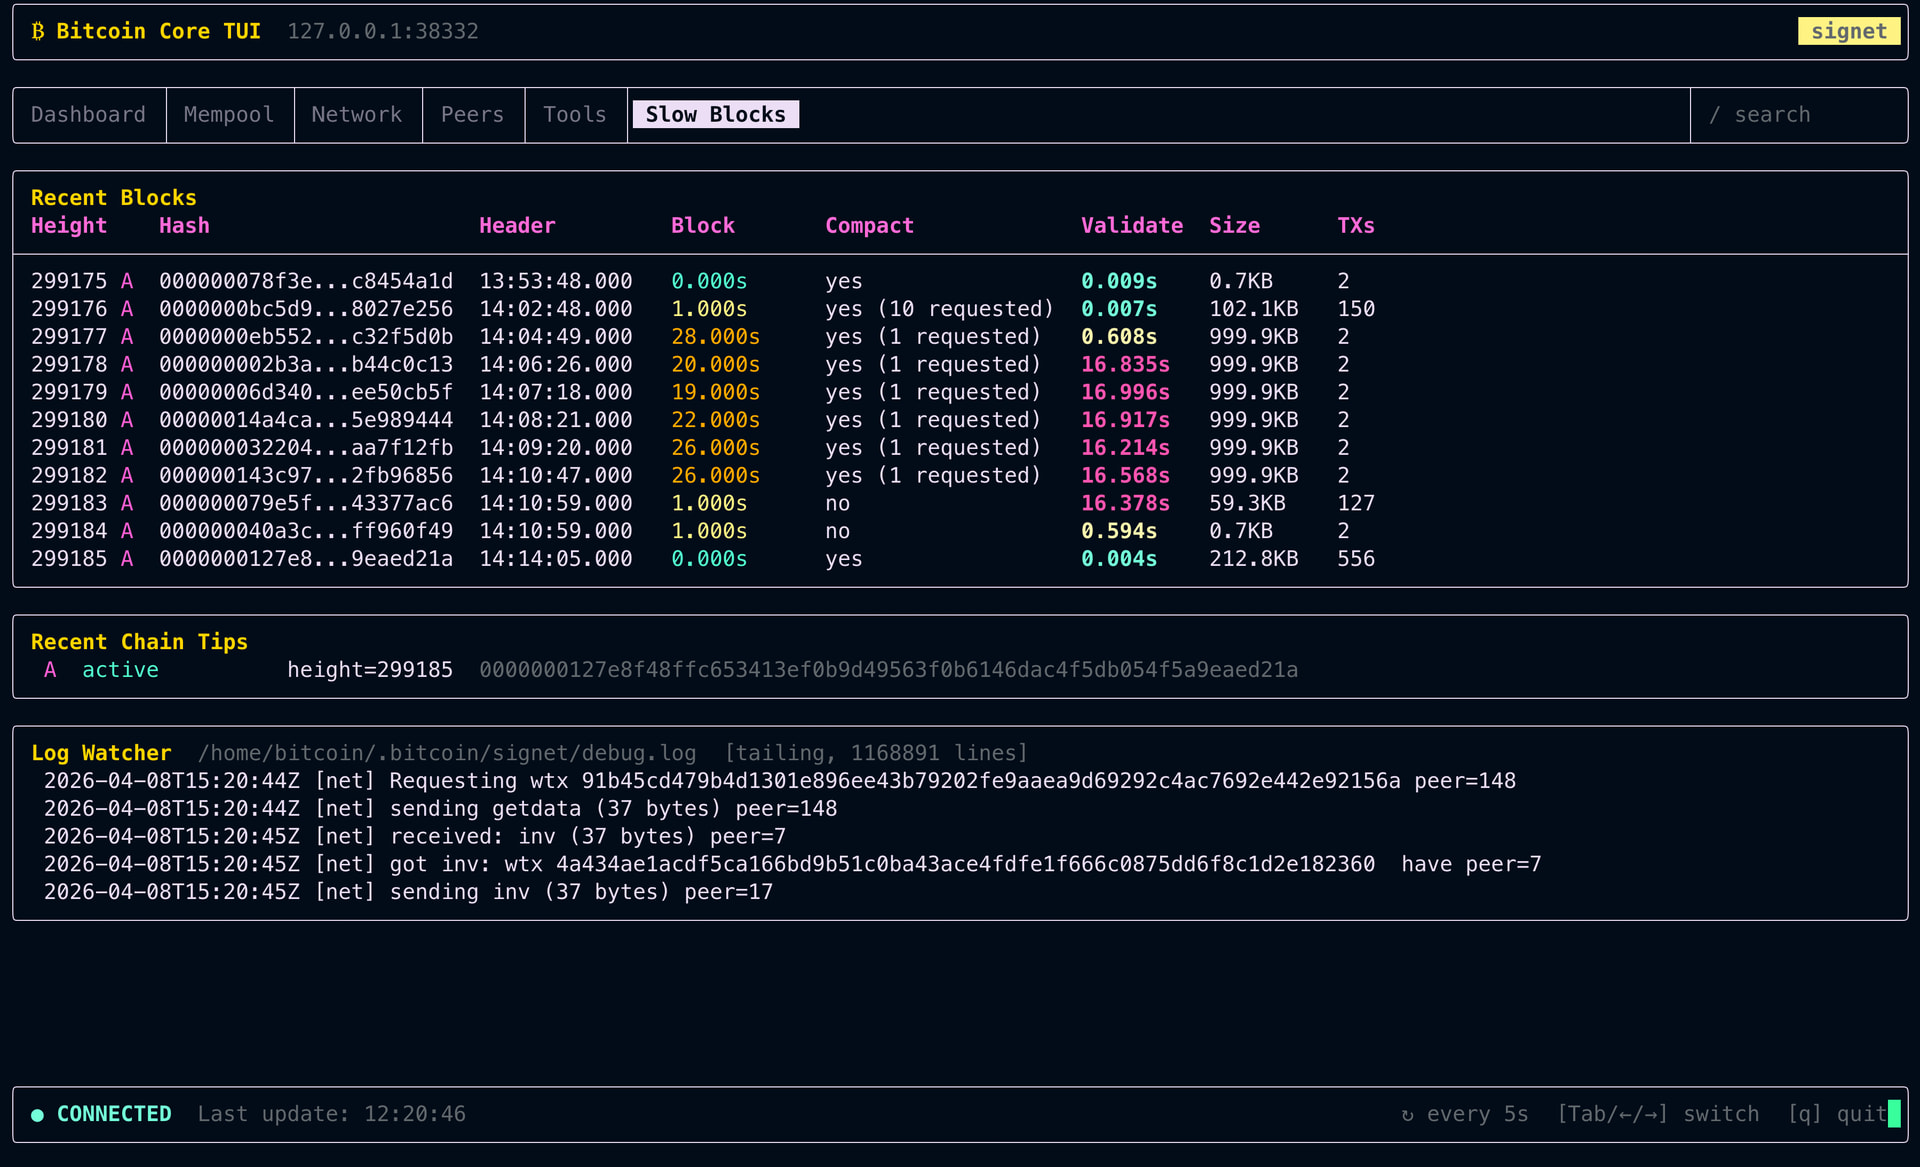
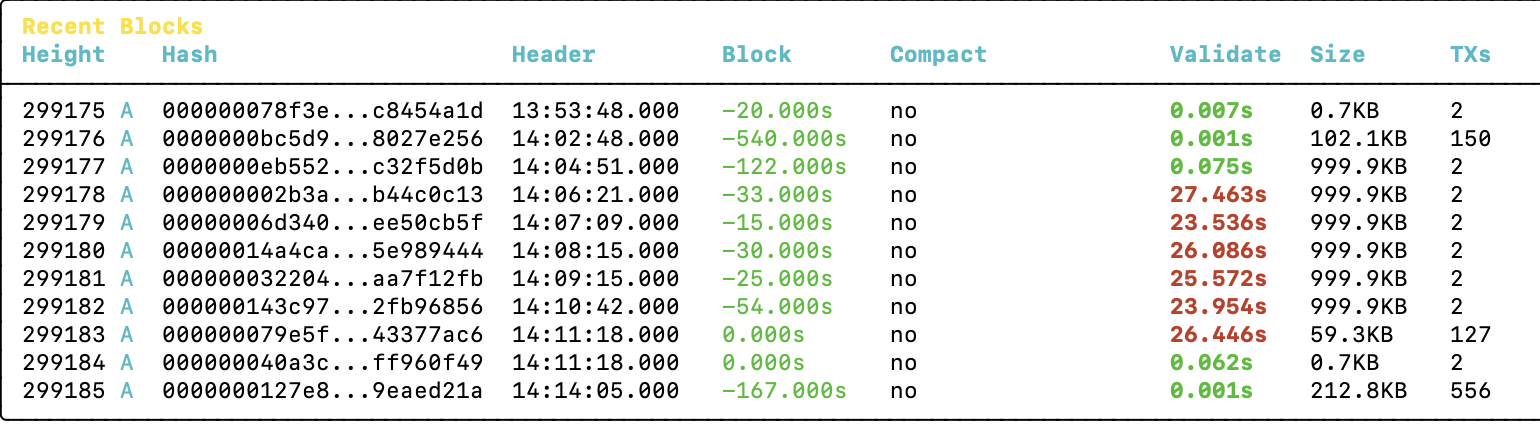
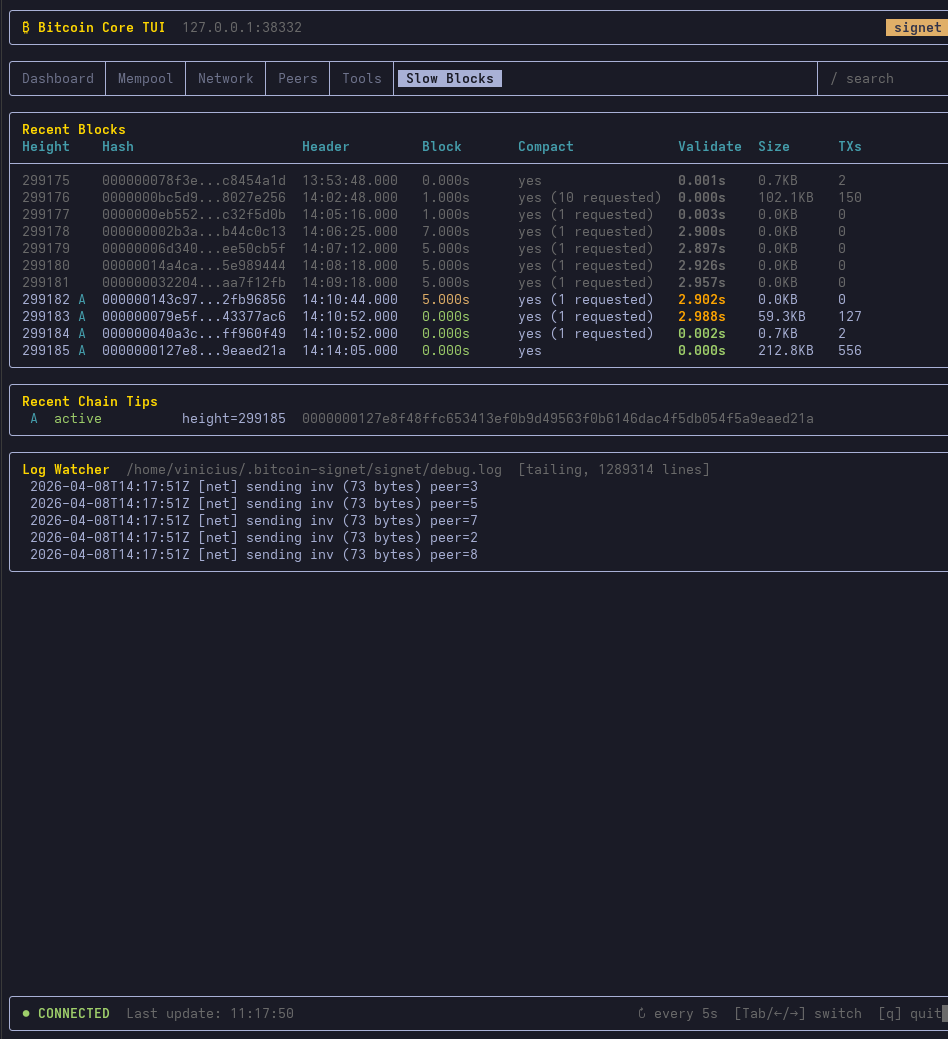
The goal of this demo is to let end users see for themselves the impact of hard to validate blocks. We have crafted a series of 6 blocks that are hard to validate, but not too much. Each should take between a handful of seconds and one minute to validate, depending on the hardware. @ajtowns is going to mine the six blocks in a row and then reorg them out, so that anyone running a Signet node at the time would see them, but they would not impose a cost to IBD forever.
We are going to do three runs of the demo so everyone has a chance to join live:
- 2026-04-08T14:00:00Z
- 2026-04-08T22:00:00Z
- 2026-04-09T09:00:00Z
How to join the demo live
All you need to join the demo is run a Bitcoin Core node on Signet. You would be able to observe how long it took your own node to validate each block, and compare arrival time with other participants. Feel free to share your results in this thread!
Your Signet node needs to be fully-synced. The historical block chain is still pretty small, you would need about 30GiB of disk space. If necessary, you can also run in -prune mode. It will not affect your ability to participate in the demo.
If you are not able to run a Signet node yourself, you should still be able to observe the blocks as they arrive on mempool.space and the fork dynamics at the temporary peer.observer instance for Signet.
Detailed instructions
If you are using a node-in-box solution (like Umbrel, Raspiblitz, MyNode, Nodl, Start9, etc..), you can still follow these instructions below to join the demo from another machine. The installation should be lightweight, using less than 50 GiB of disk space and take less than a couple hours to complete. If you prefer to follow the demo using the hardware that you use for you main node (which would be interesting), see the instructions in the following section instead.
Download Bitcoin Core if you don’t have it already by following the instructions here.
Run Bitcoin Core on the default Signet network, with some additional logging options to learn more about how your node handled the slow blocks. Specific instructions depend on your platform.
Click here for MacOS
We assume you have followed the download instructions from the Bitcoin Core website. If you followed different instructions and have a bitcoind binary instead, you can simply replace Bitcoin-Qt by bitcoind in the command line below.
Open a Terminal. This can be done by pressing Command + Space, typing “Terminal” and hitting enter.
Type the following command that starts Bitcoin Core on Signet with additional logging about validation time and p2p messages:
/Applications/Bitcoin-Qt.app/Contents/MacOS/Bitcoin-Qt -signet -debug=bench -debug=net
If you have less than 50 GiB of disk space available, add -prune=10000 to the command above to reduce disk space usage to about 20 GiB.
If you have less than 30 GiB of disk space available, add -prune=1 to the command above to reduce disk space usage to about 10 GiB.
Enter the command.
Click here for Windows
We assume you have followed the download instructions from the Bitcoin Core website. If you followed different instructions and have a bitcoind.exe binary instead, you can simply replace bitcoin-qt.exe with bitcoind.exe in the command line below.
Open Command Prompt. This can be done by pressing Windows + R, typing cmd, and pressing Enter.
Type the following command, which starts Bitcoin Core on Signet with additional logging about validation time and p2p messages:
"C:\Program Files\Bitcoin\bitcoin-qt.exe" -signet -debug=bench -debug=net
If you have less than 50 GiB of disk space available, add -prune=10000 to the command above to reduce disk space usage to about 20 GiB.
If you have less than 30 GiB of disk space available, add -prune=1 to the command above to reduce disk space usage to about 10 GiB.
Press Enter to run the command.
Click here for Linux
Instructions differ slightly depending on the Linux distribution you are running. If you know how to run Bitcoin Core on Signet you can skip this section. Here are some guidelines if you are not sure.
The Bitcoin Core download instructions will have you Download a .tar.gz archive. Extract the archive to access the bitcoind binary. Here is an example on Debian with version 30.2:
cd Downloads/
tar -xzf bitcoin-30.2-x86_64-linux-gnu.tar.gz
Run Bitcoin Core on Signet by adding the -debug=bench and -debug=net startup options. You may want to set the -prune option if you have less than 50 GiB of available disk space. Here is an example following the extraction of the archive above:
./bitcoin-30.2/bin/bitcoind -signet -debug=bench -debug=net
Bitcoin Core will synchronize with the Signet network. This could take anywhere between a few minutes and a couple hours depending on your hardware, internet connection and whether you set the prune option.
During the demo, you can observe block validation time as well as propagation dynamics by monitoring Bitcoin Core’s log file: debug.log. Its location depends on your platform.
Click here for MacOS
To follow the blocks live, you can use the tail -f command. It will print the last lines of the debug.log file and automatically refresh as more are added to it. After the demo, if you are looking for a specific block, or the timestamp of some p2p message, you can use the less command on the debug.log file instead. You may also want to explore the log file using graphical tools as well, but those are out of scope for this small instructional.
Make sure Bitcoin Core is still running. (If you followed the instructions above, it must still be running in the first terminal you started.)
Open a new Terminal. This can be done by pressing Command + Space, typing “Terminal” and hitting enter.
Use this command to display an automatically refreshed view of the latest Bitcoin Core logs:
tail -n 50 -f ~/Library/Application\ Support/Bitcoin/signet/debug.log
To search for a past event you may use your favorite graphical tool or the less command:
~/Library/Application\ Support/Bitcoin/signet/debug.log
Click here for Windows
On Windows, Bitcoin Core’s log file for Signet is located here:
%APPDATA%\Bitcoin\signet\debug.log
A simple way to access it is to press Windows + R, copy paste the above, and press enter. It will open a file browser at the location of the debug.log. You can then use your favourite tool to inspect its content.
If anyone with Windows experience wants to contribute better instructions, please shoot.
Click here for Windows
On Linux, Bitcoin Core’s log file for Signet is located at:
~/.bitcoin/signet/debug.log
You can monitor it live with:
tail -n 50 -f ~/.bitcoin/signet/debug.log
You can search for specific content (block hashes, block heights, p2p messages, etc..) with:
less ~/.bitcoin/signet/debug.log
I may add more information about what to look for in the logs later.
Detailed instructions for node-in-a-box solutions
Joining the demo using an Umbrel node
NOTE: Running the Bitcoin app on Signet will stop your mainnet node.
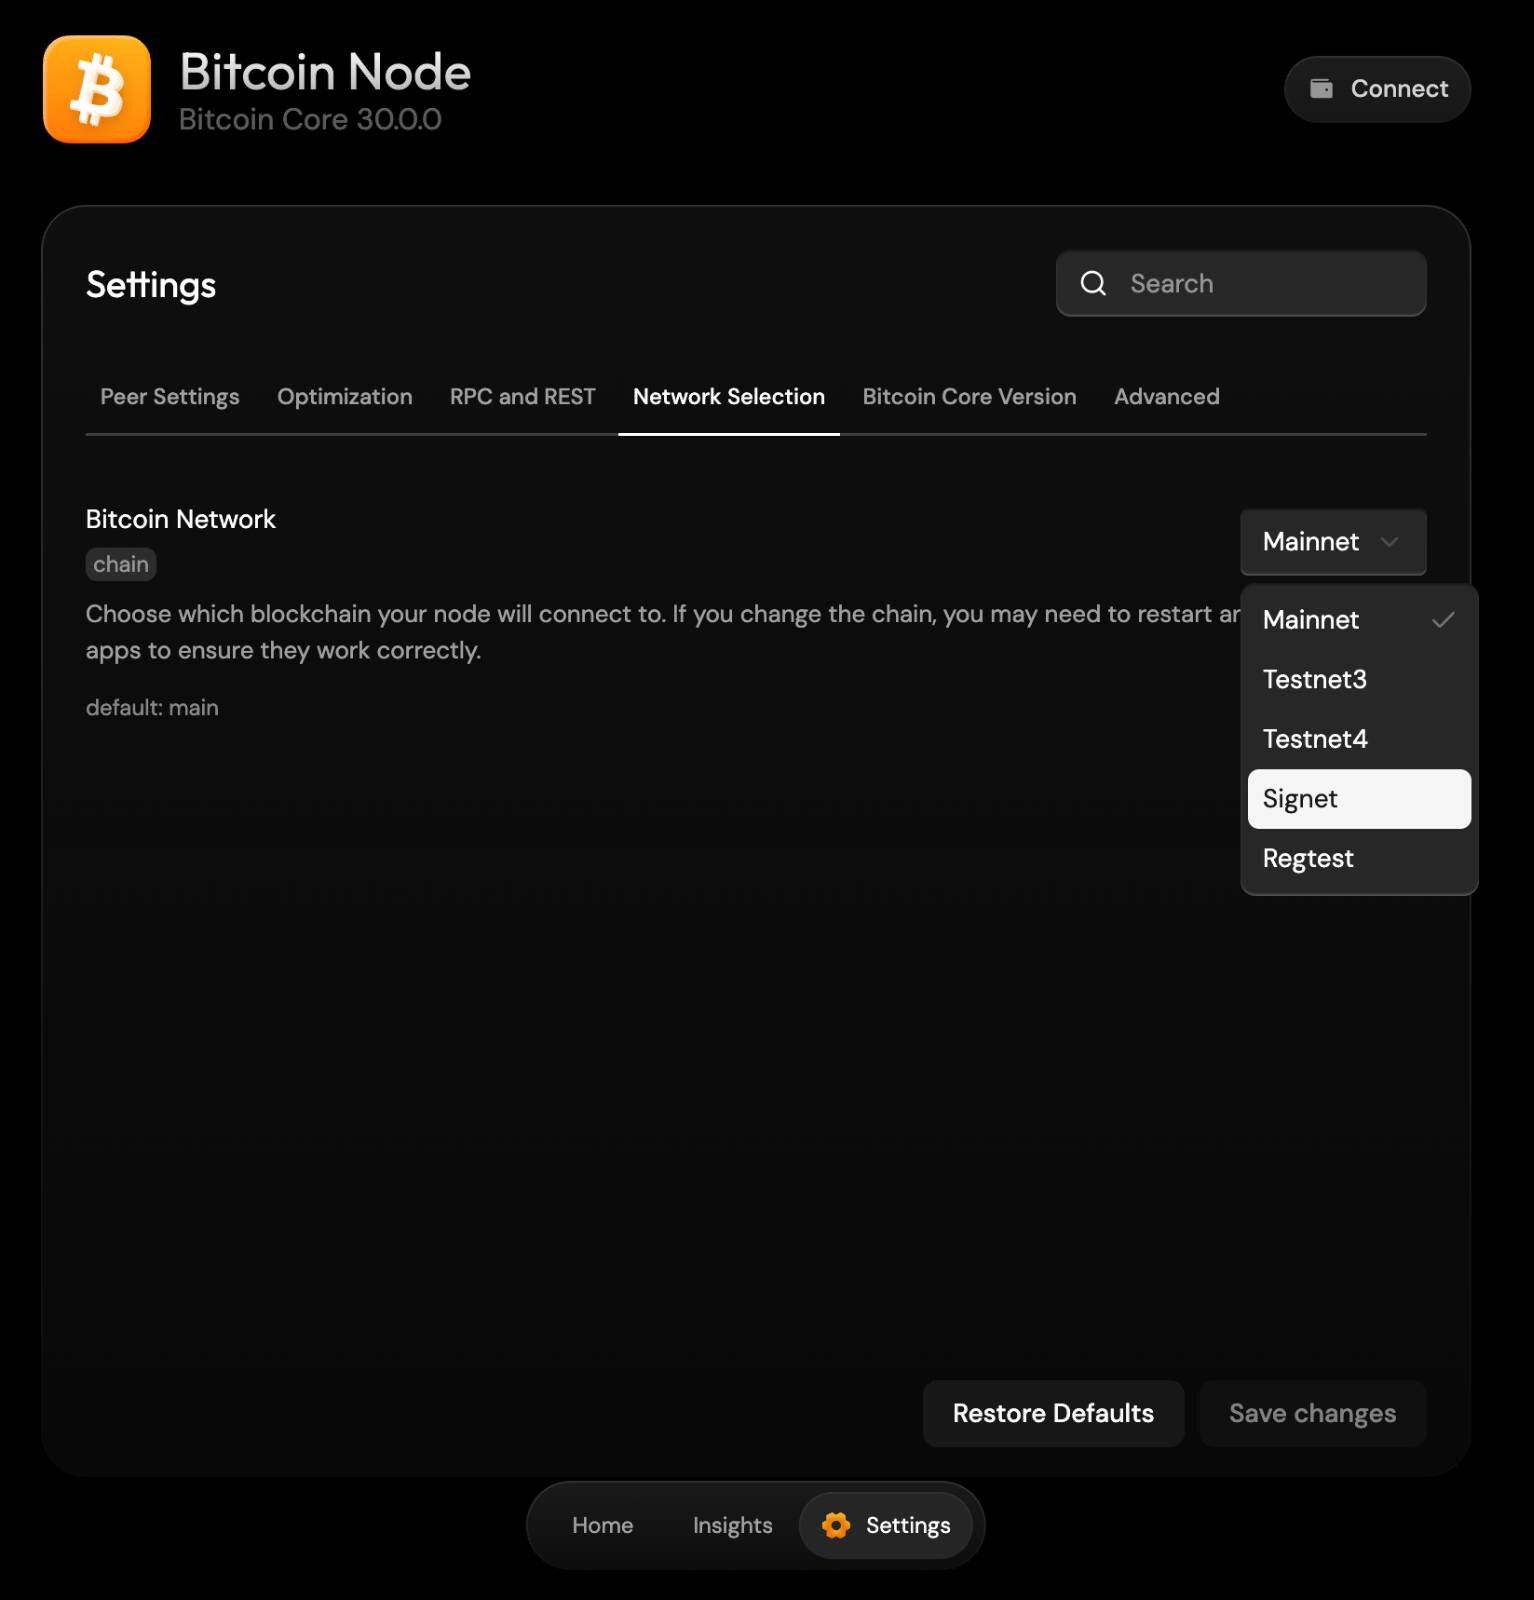
The Bitcoin Node app on Umbrel supports Signet. It can be configured in Settings > Network Selection > Signet.
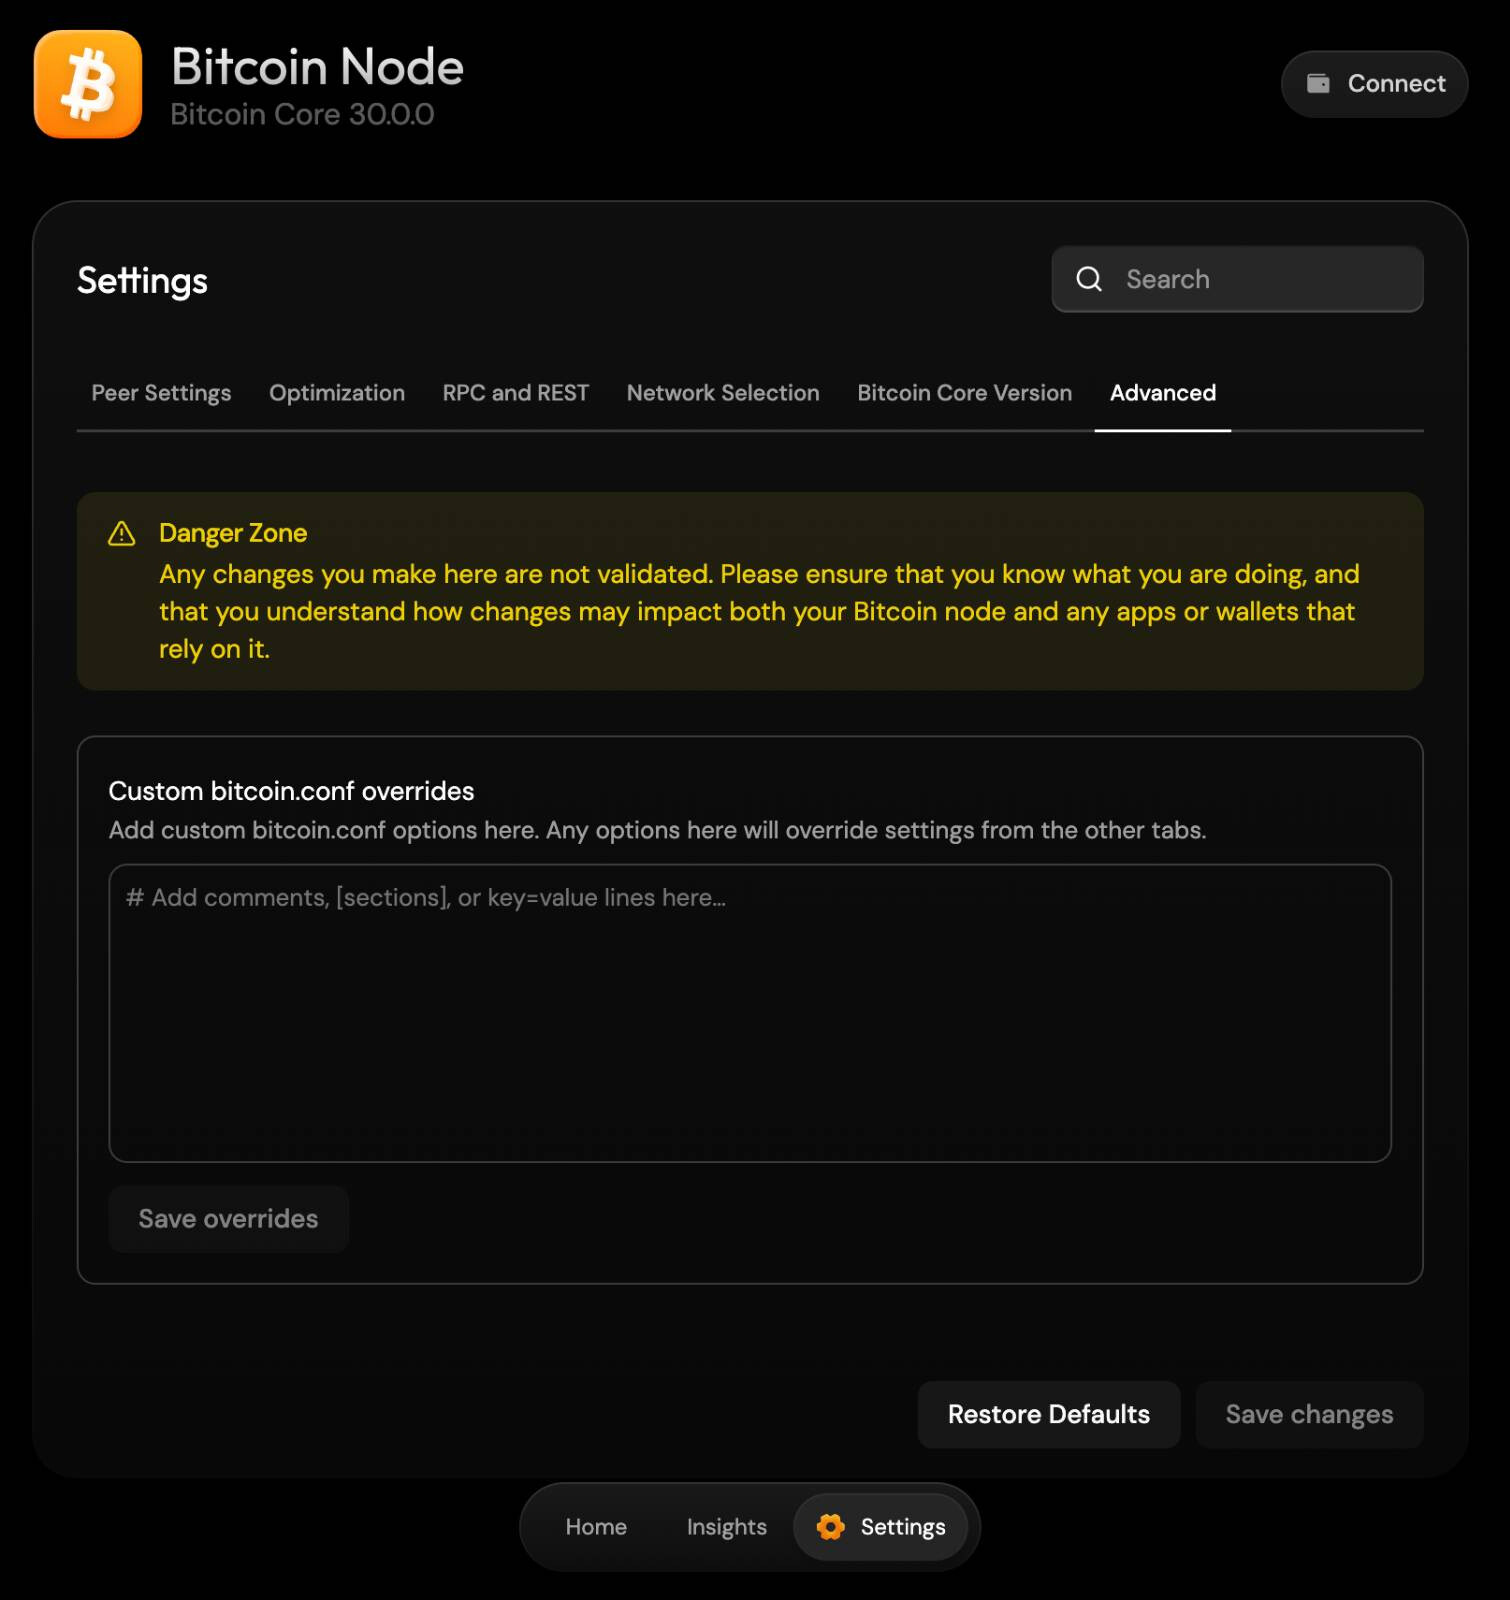
You can enable more logging about block validation time and p2p messages by customizing the Bitcoin Core configuration in the Advanced tab on the same panel. To do that (optional), write the following lines:
debug=bench
debug=net
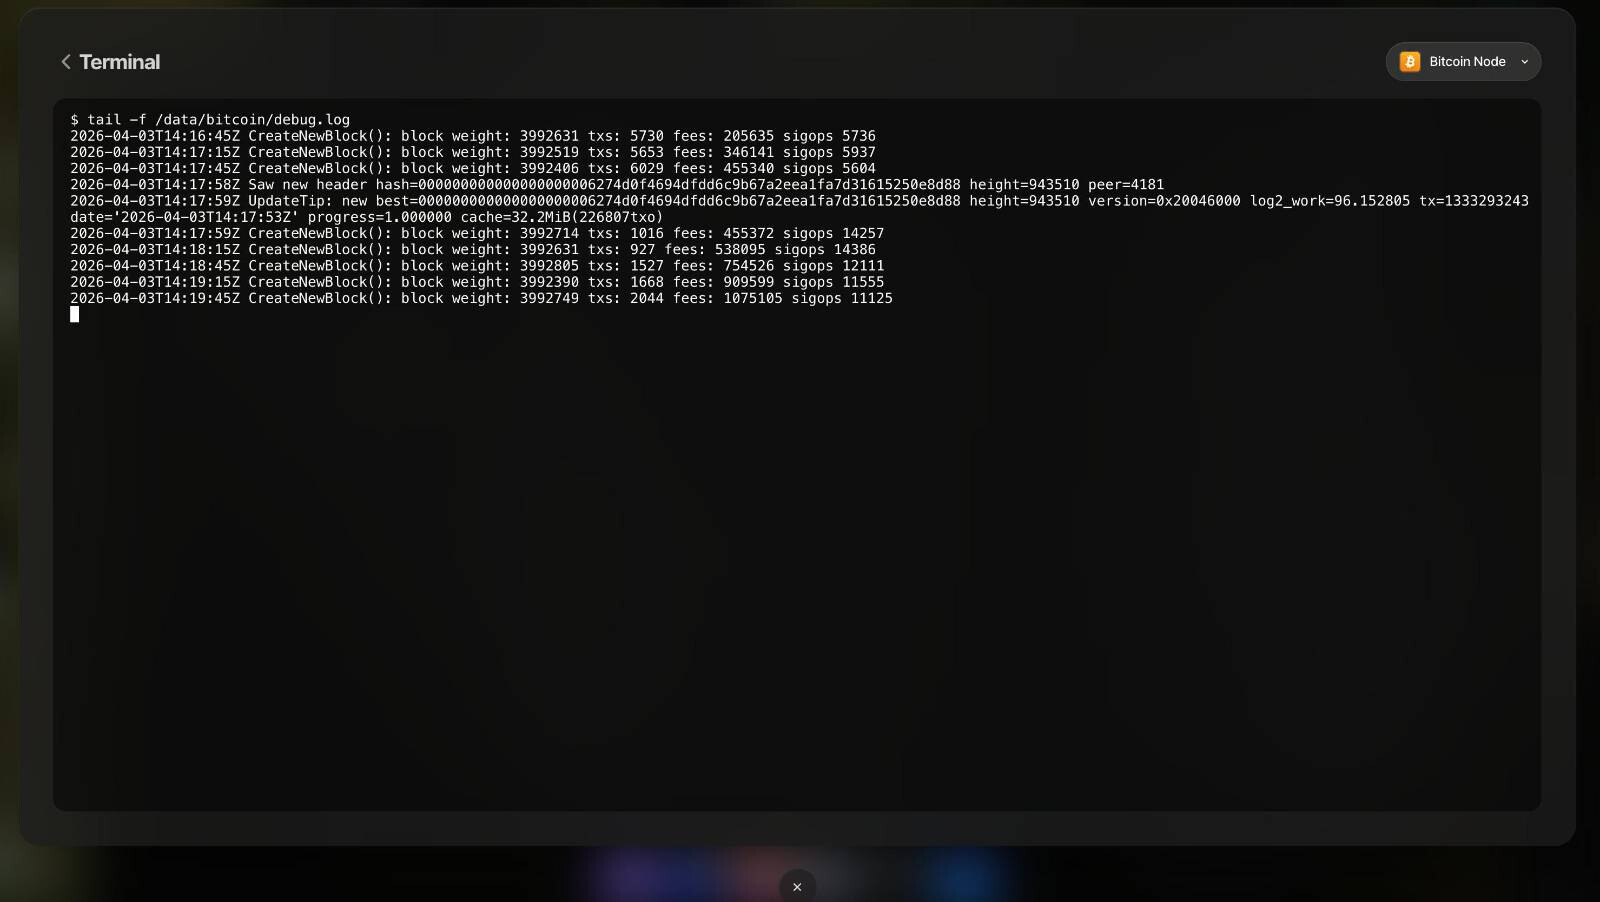
You can observe validation time and propagation dynamics of the slow blocks by monitoring Bitcoin Core’s log file: debug.log. The most straightforward way of achieving this in Umbrel would be to run a Terminal for the Bitcoin Node app, at Settings > Advanced > Terminal > App > Bitcoin Node.
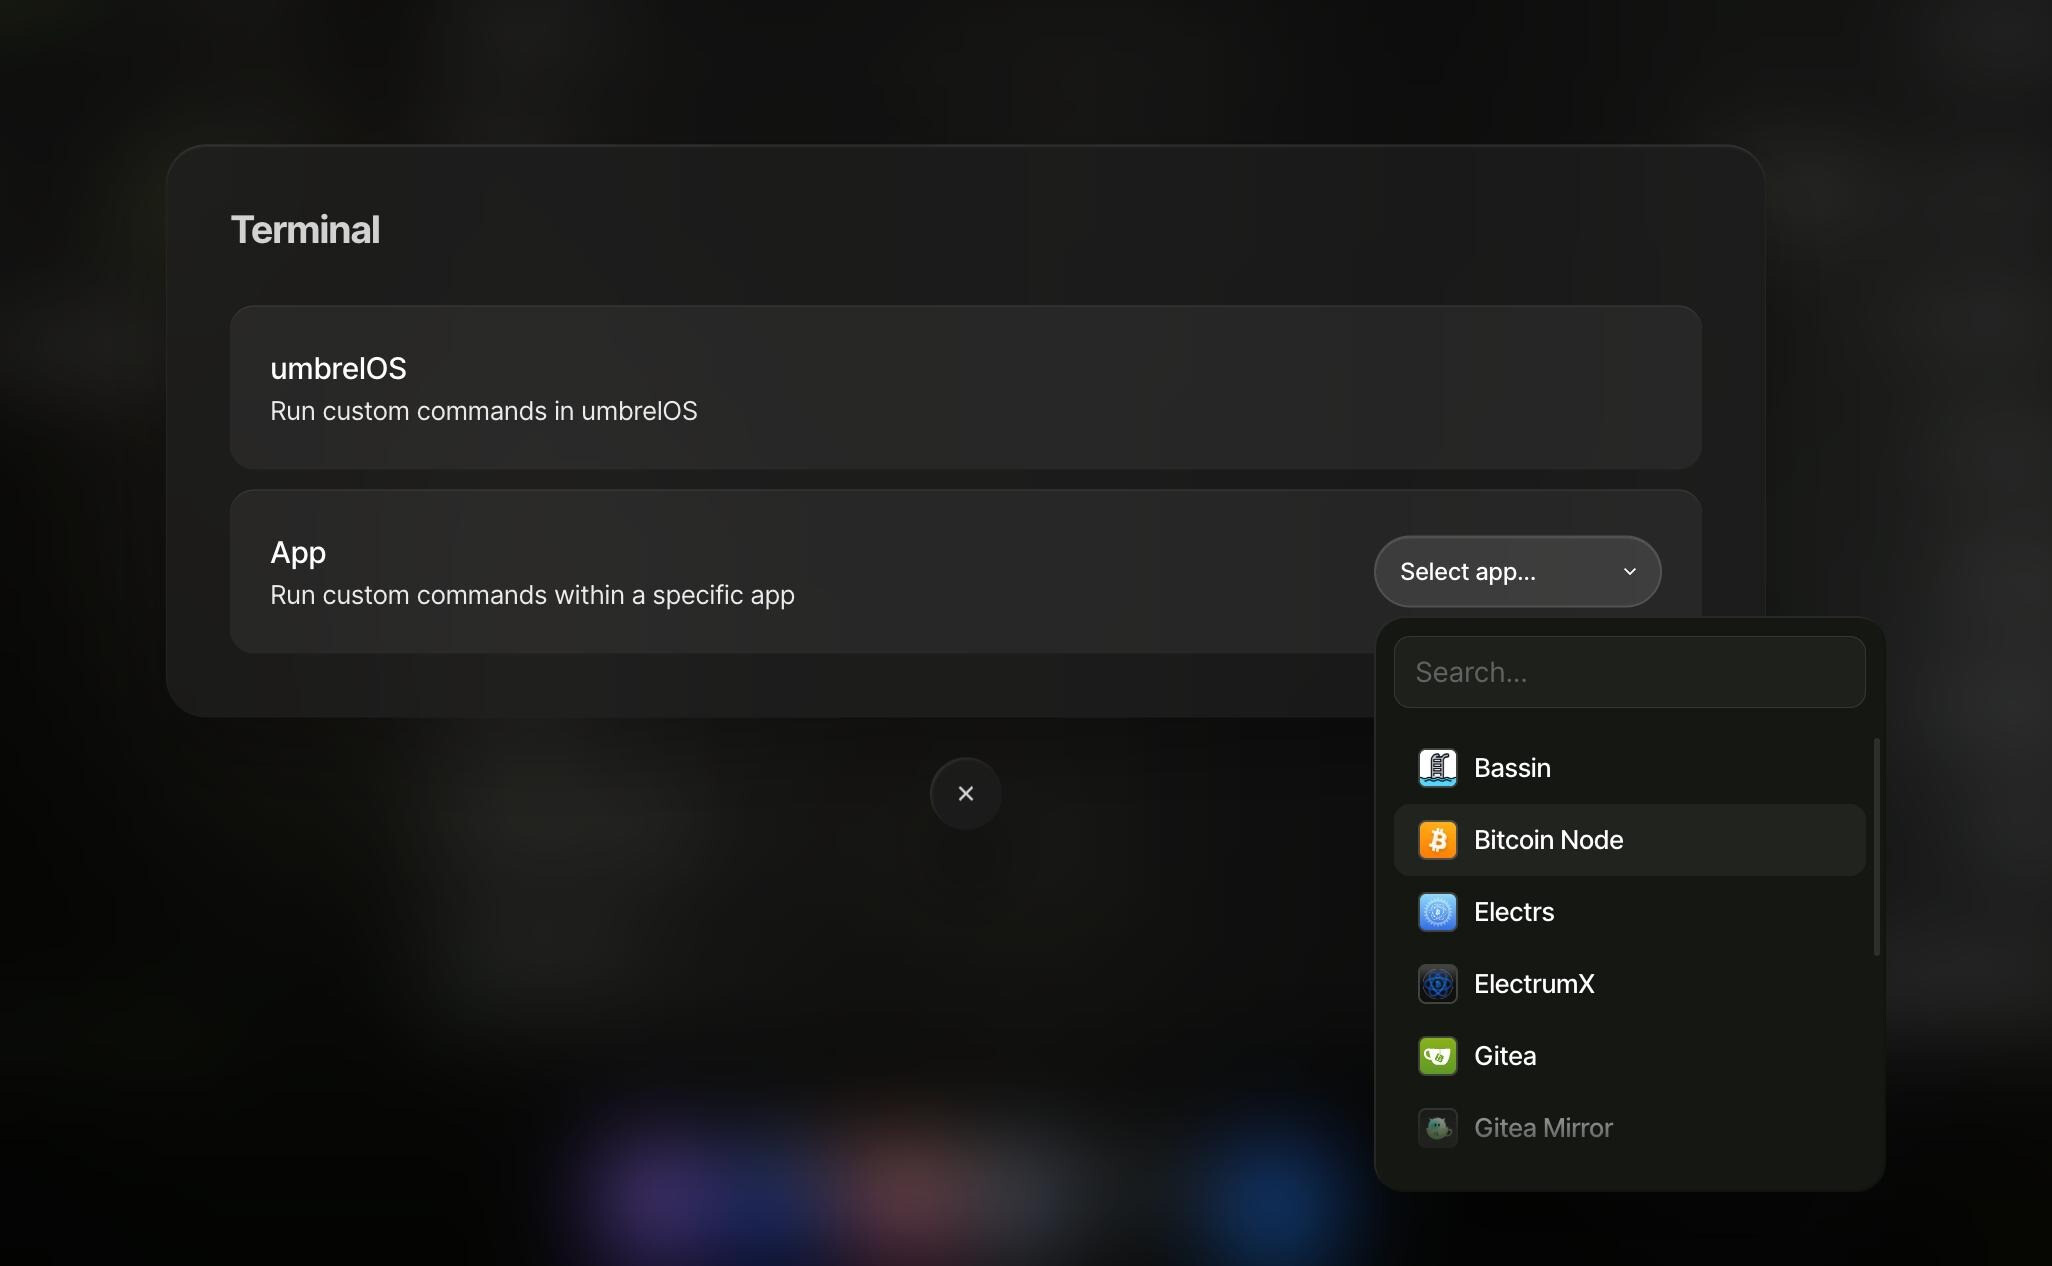
Then you can for instance poll latest events using tail -f /data/bitcoin/debug.log:
Alternately, if you are looking for a past event, you can use the less command and search through the file by hitting /, typing the search query and hitting enter (hit n to jump to the next match).
Joining the demo using a Raspiblitz node
h/t Openoms
Syncing signet on an RPi5 should take less than an hour (but allow a little more time just in case).
You can start the signet bitcoind instance on a Raspiblitz by running:
config.scripts/bitcoin.install.sh on signet
You will have these aliases set in terminal for easy monitoring and configuration:
alias sbitcoin-cli="sudo -u bitcoin /usr/local/bin/bitcoin-cli -rpcport=38332"
alias sbitcoinlog="sudo -u bitcoin tail -n 30 -f /mnt/hdd/app-data/bitcoin/signet/debug.log"
alias bitcoinconf="sudo nano /mnt/hdd/app-data/bitcoin/bitcoin.conf"
The systemd service is called: sbitcoind so can check and restart with:
systemctl status sbitcoind
sudo systemctl restart sbitcoind
")